Chat
ChatClient.java ```JAVA import java.net.; import java.io.;
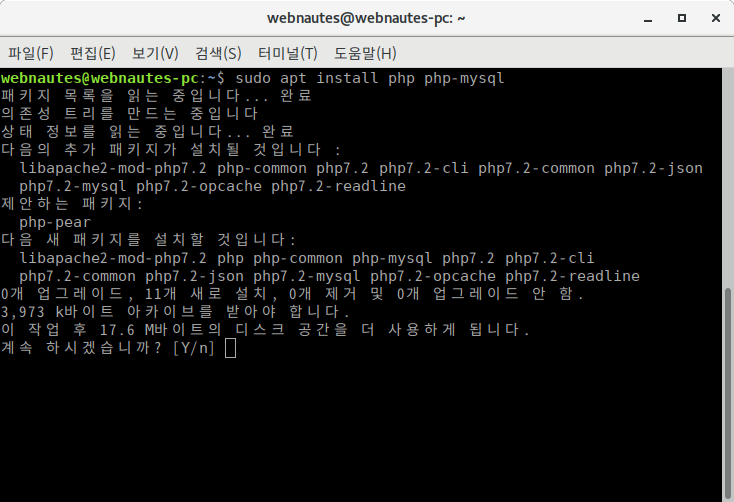
sudo apt install php php-mysql 명령어를 통해 php 설치

$ sudo nano /var/www/html/info.php 명령어를 통해 info 파일을 편집기로 열어서 <?php phpinfo(); ?> 를 입력결과:
sudo apt install mysql-server 명령어를 통해 mysql 서버 패키지 설치webnautes@webnautes-pc:~$ sudo mysql_secure_installation
Securing the MySQL server deployment.
Connecting to MySQL using a blank password.
VALIDATE PASSWORD PLUGIN can be used to test passwords
and improve security. It checks the strength of password
and allows the users to set only those passwords which are
secure enough. Would you like to setup VALIDATE PASSWORD plugin?
Press y|Y for Yes, any other key for No: y
There are three levels of password validation policy:
LOW Length >= 8
MEDIUM Length >= 8, numeric, mixed case, and special characters
STRONG Length >= 8, numeric, mixed case, special characters and dictionary file
Please enter 0 = LOW, 1 = MEDIUM and 2 = STRONG: 1
Please set the password for root here.
New password: root 패스워드를 입력합니다.
Re-enter new password:
Estimated strength of the password: 50
Do you wish to continue with the password provided?(Press y|Y for Yes, any other key for No) : y
By default, a MySQL installation has an anonymous user,
allowing anyone to log into MySQL without having to have
a user account created for them. This is intended only for
testing, and to make the installation go a bit smoother.
You should remove them before moving into a production
environment.
데이터베이스를 아무나 읽어볼 수 없게 합니다.
Remove anonymous users? (Press y|Y for Yes, any other key for No) : y
Success.
그 후, DB를 새로 생성하고 DB를 사용할 사용자도 새로 생성한 뒤 사용자에게 DB를 사용할 권한을 부여하면 mysql을 사용할 수
결과:
sudo apt install phpmyadmin 명령어로 phpmyadmin을 설치결과:
상태 확인: service apache2 status 시작: service apache2 start 중지: service apache2 stop 재시작: service apache2 restart
sudo nano /etc/apache2/apache2.conf 명령어를 실행하여 아파치 설정 파일을 켠다<VirtualHost *:80> DocumentRoot /home/yeon/apachewebserver/www/html </VirtualHost>
라는 부분을 찾아서 DocumentRoot에 새 루트디렉토리로 사용할 위치를 넣는다.
3. ```sudo nano /etc/apache2/sites-available/000-default.conf``` 를 통해 아파치 웹서버의 사이트 설정파일을 수정한다. (000-default.conf 파일수정)
4. 아파치 웹서버 중지 후 재시작

### DB 계정 만들어 wordpress 간단 설치 및 확인
1. 워드프레스용 DB를 생성하고 DB에 사용자 계정 연결
2. 여러 유용한 php 익스텐션들 설치 (생략 가능?)
sudo apt update sudo apt install php-curl php-gd php-intl php-mbstring php-soap php-xml php-xmlrpc php-zip
3. 워드프레스 파일 다운로드 및 압축
1.특정 계정의 홈디렉터리 가동 체크 및 해당 디렉토리로 이동 2.최신 워드프레스 설치용 압축파일 다운로드 $ wget https://wordpress.org/latest.tar.gz 3.압축풀기 $ tar –xvzf lastest.tar.gz 4.압축파일 삭제
4. 워드프레스 설정 파일 세팅
결과:
$ sudo nano /etc/apache2/ports.conf 를 통해 포트 설정파일에 들어가서 사용할 새로운 포트를 등록한다sudo vi /etc/apache2/sites-available/000-default.conf 을 통해 설정파일 접속<VirtualHost *:80> DocumentRoot /home/yeon/apachewebserver/www/html </VirtualHost> <VirtualHost *:8081> DocumentRoot /home/yeon/testserver/www/html </VirtualHost>
같은 방식으로 새로운 포트에 대한 설정을 마침 (DocumentRoot는 내가 이 가상 호스트에게 주려는 루트 경로를 넣어주면 된다)
3. 위에 올린 것처럼 새로운 계정에 워드프레스 새로 설치
4. 포트 번호를 바꿔가며 워드프레스 확인
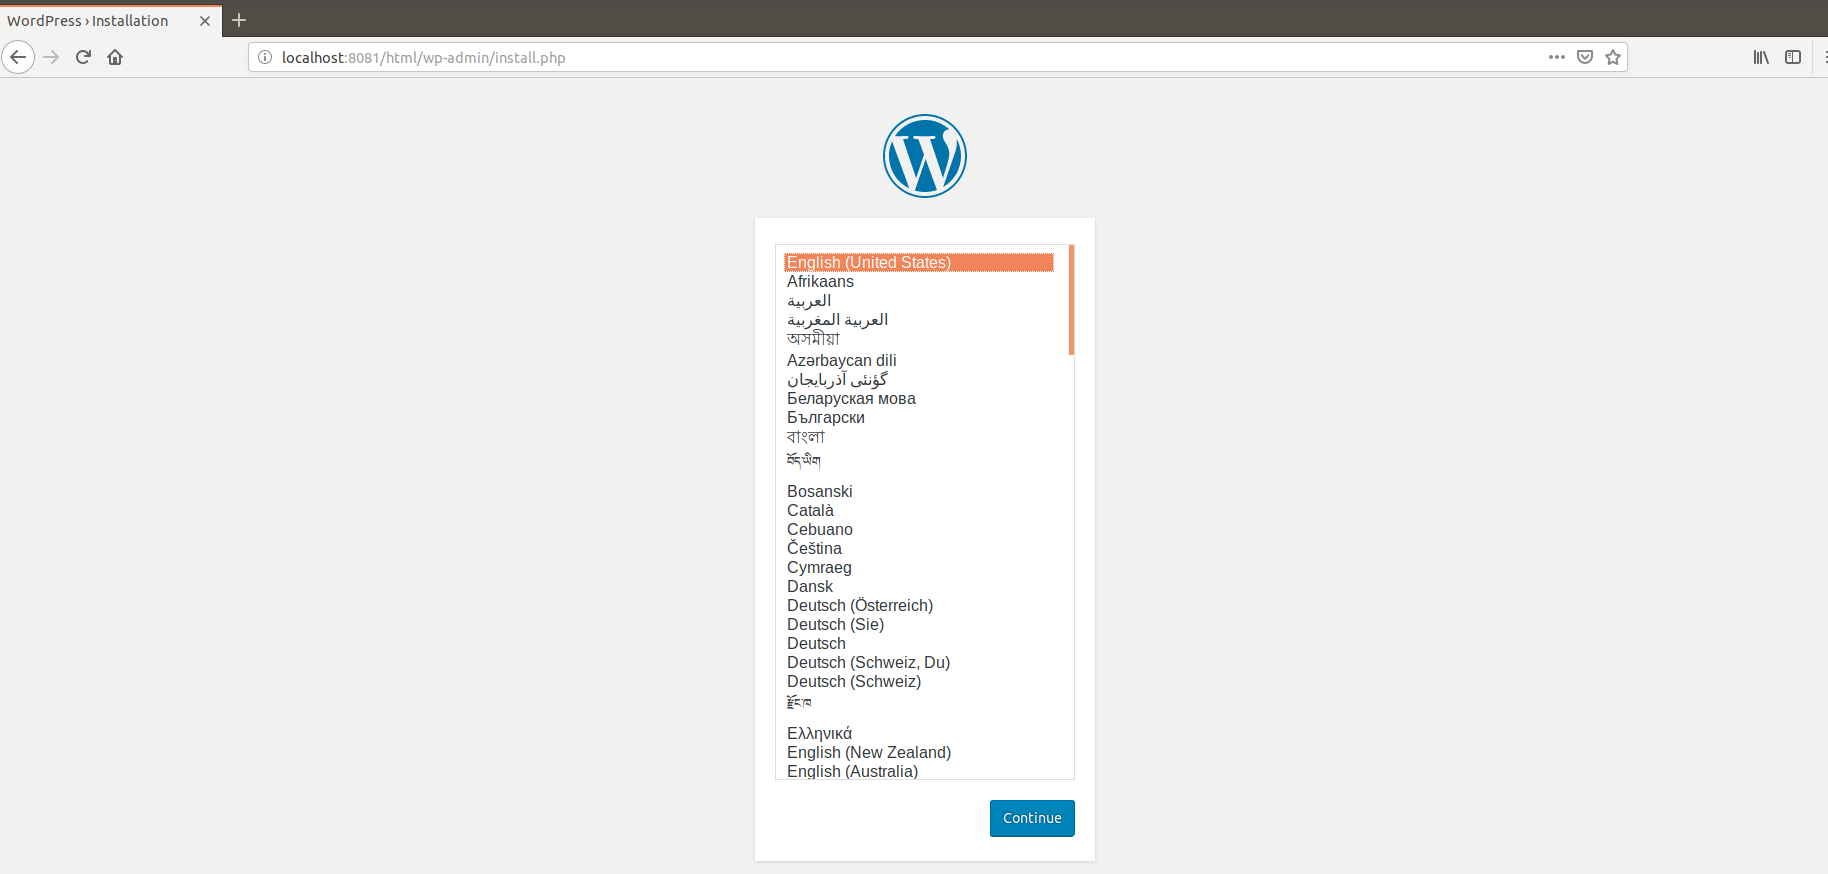
결과: 
새로 만든 8081 포트에 정상적으로 워드프레스가 설치된 다른 경로를 불러온 것을 확인할 수 있다.
---
참고 자료:
https://blog.outsider.ne.kr/346 https://www.manualfactory.net/10175 https://ngee.tistory.com/128 // Apt 명령어 설명
https://webnautes.tistory.com/1185 // php, mysql, phpmyadmin 설치 설명
https://zetawiki.com/wiki/%EC%95%84%ED%8C%8C%EC%B9%98_%EC%9B%B9%EC%84%9C%EB%B2%84 // 아파치 서버 관련 명령어 설명
https://m.blog.naver.com/yexx/220720241912 https://m.blog.naver.com/cjwdark/220617377179 https://blog.xianchoi.kr/268 // 아파치 웹서버 홈 디렉토리 변경 설명
https://antilibrary.org/1884 https://ko.wordpress.org/txt-install/ https://jimnong.tistory.com/746 https://webdir.tistory.com/210 // wordpress 설치 설명
https://mygumi.tistory.com/64 https://webdir.tistory.com/213 https://osasf.net/discussion/607/apache%EC%97%90%EC%84%9C-%EB%8B%A4%EC%A4%91-%ED%8F%AC%ED%8A%B8-%EC%84%A4%EC%A0%95%ED%95%98%EB%8A%94-%EB%B0%A9%EB%B2%95 // 가상 호스트 설정 설명 ```
ChatClient.java ```JAVA import java.net.; import java.io.;
웹 호스팅 가상 호스트
Contents Management System
Ubuntu Apt 명령어 설명
가상 머신으로 리눅스(Ubuntu) 서버 구축하기 우분투를 설치하는 방법은 여러가지가 있다.
DNS DNS란?
서버와 서비스
Git과 Github 기초 사용법
Java Interface
Java Inheritance
Java Abstarct Class
Vim - Vi improvement
OSS와 실전프로젝트 2 수업에서 필요한 내용들을 업로드하는 용도입니다.
OSS 수업에서 리눅스 명령어들을 연습하고 블로그에 포스팅하라는 과제가 나왔습니다.